

Here are the steps to reset your MacBook Air to factory settings without a disc:
- Shut down your MacBook Air and unplug any external devices.
- Start up your MacBook Air by pressing the power button.
- Hold down the Command + R keys while the MacBook Air is starting up.
- Release the keys when you see the Apple logo or the spinning globe.
- Wait for the macOS Utilities window to appear.
- Select “Disk Utility” and click on “Continue”.
- Select the hard drive that you want to erase (usually named “Macintosh HD” or similar).
- Click on the “Erase” button.
- Enter a new name for the hard drive (if desired) and select the format (Mac OS Extended (Journaled) is recommended).
- Click on the “Erase” button to confirm the process.
- Once the erase process is complete, exit Disk Utility and select “Reinstall macOS” from the macOS Utilities window.
- Follow the on-screen instructions to complete the installation process.

Please note that this process will erase all data, including files, applications, and settings from your MacBook Air, so make sure to backup any important data before proceeding.
Resetting your MacBook Air to factory settings can be a great way to fix any software issues you may be experiencing, or to prepare your device for a new user. However, many users may not have the original installation disc that came with their MacBook Air, making the process of resetting the device a bit more challenging. Fortunately, there are still several ways to reset your MacBook Air to factory settings without the need for an installation disc.
Before we begin, it’s important to note that resetting your MacBook Air to factory settings will erase all data, including files, applications, and settings. Therefore, it’s essential to make sure that you have backed up all of your important data before proceeding. This can be done by using Time Machine, iCloud, or an external hard drive.
Contents
Method 1: Using macOS Recovery
One of the easiest ways to reset your MacBook Air to factory settings without a disc is by using macOS Recovery. This built-in feature allows you to reinstall the macOS operating system and restore your device to its original factory settings. Here’s how to use macOS Recovery:
- Shut down your MacBook Air and unplug any external devices.
- Start up your MacBook Air by pressing the power button.
- Hold down the Command + R keys while the MacBook Air is starting up.
- Release the keys when you see the Apple logo or the spinning globe.
- Wait for the macOS Utilities window to appear.
- Select “Disk Utility” and click on “Continue”.
- Select the hard drive that you want to erase (usually named “Macintosh HD” or similar).
- Click on the “Erase” button.
- Enter a new name for the hard drive (if desired) and select the format (Mac OS Extended (Journaled) is recommended).
- Click on the “Erase” button to confirm the process.
- Once the erase process is complete, exit Disk Utility and select “Reinstall macOS” from the macOS Utilities window.
- Follow the on-screen instructions to complete the installation process.
Method 2: Using Time Machine
Another way to reset your MacBook Air to factory settings without a disc is by using Time Machine. This built-in feature allows you to create a backup of your entire system, including all of your files, applications, and settings. Once you’ve created a backup, you can then restore your MacBook Air to the state it was in when the backup was created. Here’s how to use Time Machine:
- Connect an external hard drive to your MacBook Air.
- Open Time Machine by clicking on the Time Machine icon in the menu bar.
- Click on “Back Up Now” to create a backup of your entire system.
- Once the backup process is complete, shut down your MacBook Air and unplug any external devices.
- Start up your MacBook Air by pressing the power button.
- Hold down the Command + R keys while the MacBook Air is starting up.
- Release the keys when you see the Apple logo or the spinning globe.
- Wait for the macOS Utilities window to appear.
- Select “Restore from Time Machine Backup” and click on “Continue”.
- Select the backup that you want to restore from and click on “Continue”.
- Follow the on-screen instructions to complete the restore process.

Method 3: Using iCloud
Another option for resetting your MacBook Air to factory settings without a disc is by using iCloud. This built-in feature allows you to create a backup of your entire system, including all of your files, applications, and settings, and then restore your MacBook Air to its original factory settings. Here’s how to use iCloud:
- Make sure that you are connected to the internet and that iCloud is set up on your MacBook Air.
- Go to Apple menu > System Preferences > iCloud.
- Click on “Backup” and select “Back Up Now” to create a backup of your entire system.
- Once the backup process is complete, shut down your MacBook Air and unplug any external devices.
- Start up your MacBook Air by pressing the power button.
- Hold down the Command + R keys while the MacBook Air is starting up.
- Release the keys when you see the Apple logo or the spinning globe.
- Wait for the macOS Utilities window to appear.
- Select “Restore from iCloud Backup” and click on “Continue”.
- Sign in to iCloud using your Apple ID and password.
- Select the backup that you want to restore from and click on “Continue”.
- Follow the on-screen instructions to complete the restore process.
Please note that this process may take some time to complete, depending on the size of your backup and the speed of your internet connection. Also, make sure that you have enough storage on your iCloud account to perform the backup.
Useful Solution For Various Reasons
Resetting your MacBook Air to factory settings can be a useful solution for various reasons, such as preparing to sell your device or resolving persistent software issues. While older MacBook models might have required installation discs for this process, newer MacBook Airs allow for a straightforward reset without the need for physical media. Here’s a step-by-step guide on how to reset your MacBook Air to factory settings without using a disc.
Back Up Your Data
Before initiating the reset, ensure all your important files are backed up to prevent data loss. You can use Time Machine or manually copy your files to an external drive.

Sign Out of iCloud
Open System Preferences, go to Apple ID, and sign out of iCloud. This helps dissociate your MacBook Air from your Apple ID.
Restart in Recovery Mode
Restart your MacBook Air and hold down Command + R until the Apple logo appears. This boots your device into Recovery Mode.
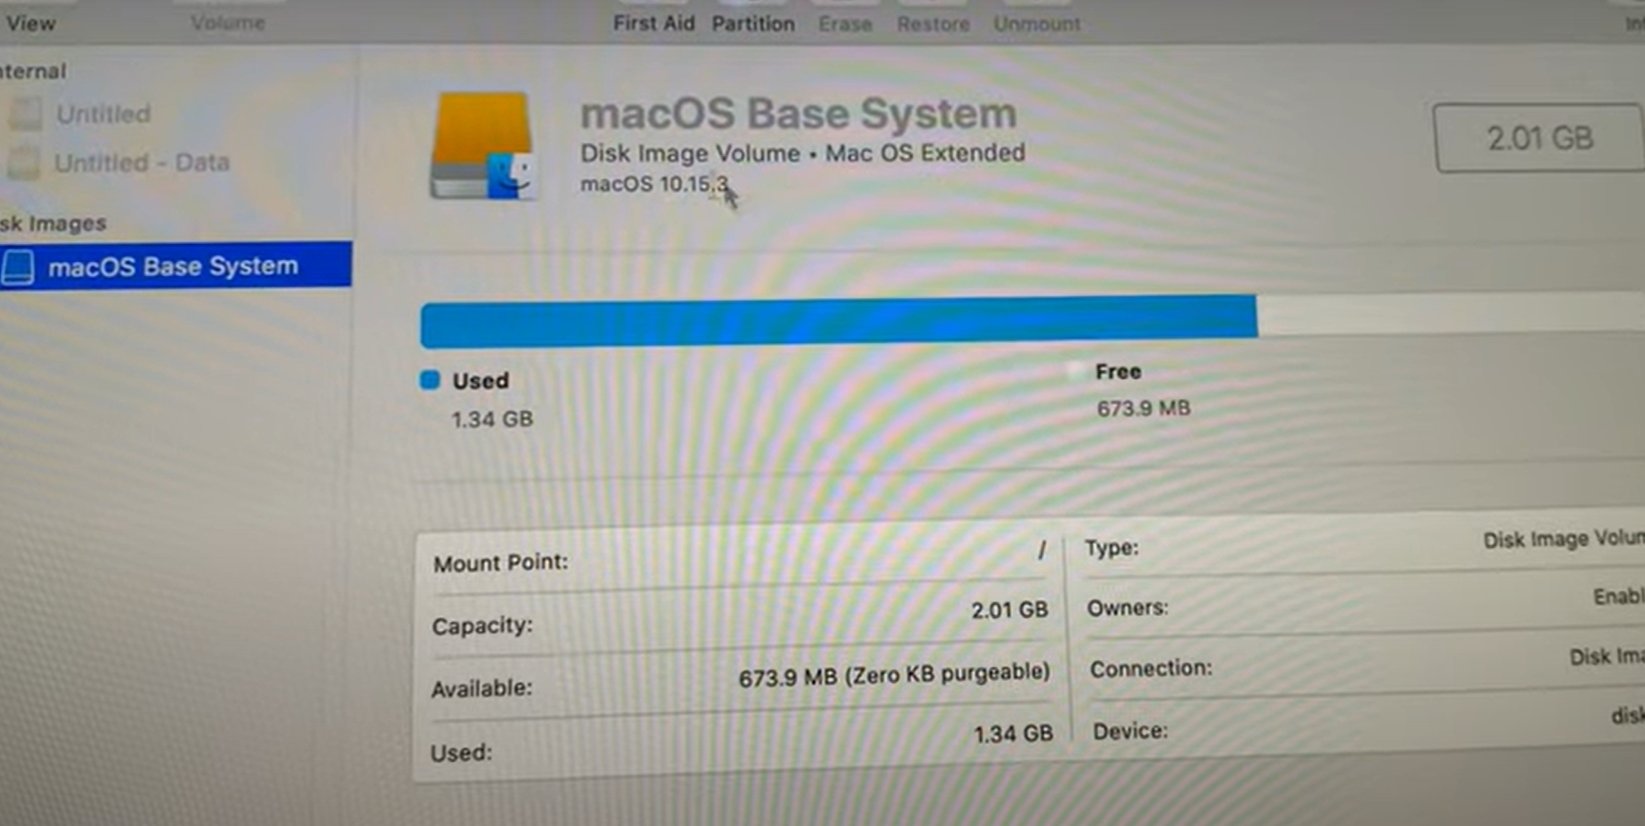
Erase the Disk
In Recovery Mode, select Disk Utility, choose your main disk, and click Erase. This step wipes all data from the disk.
Reinstall macOS
Exit Disk Utility, choose Reinstall macOS, and follow the on-screen instructions. This reinstalls the operating system on your MacBook Air.

Set Up Your MacBook Air
Once the reinstallation is complete, set up your MacBook Air as if it were brand new. You’ll be prompted to sign in with your Apple ID and restore your data from the backup.